Storm ST
Overview
The Storm ST is a compact add-on for Atari ST, STM, STF, STFM and MegaST computers with the following features:
- 8 megabytes of additional RAM (alternate RAM) usable with TOS 2.06, EmuTOS and MagiC. (Note: Alternate RAM is not supported by TOS 1.xx.)
- Address decoder for TOS 1.0x, TOS 2.0x and EmuTOS – perfect in combination with a Cloudy flashable TOS board (hexE00000) .
- Connector for an optional real time clock (RTC, see below under 5.1).
- Fully compatible with a variety of expansions, e.g., Cloudy, Lightning ST, 12 MHz acceleration, PAK, ...
Important note on what is meant by alternate RAM:
The Storm ST is not a general-purpose ST-RAM extension. TOS 1.x is not supported because it lacks the Mxalloc() GEMDOS function. TOS 2.06, EmuTOS or MagiC is required. Alternate RAM is extra memory, which usable by the 68000 and Blitter, but is not usable by Shifter and DMA. This board is only for ST or Mega ST (STe is not supported). However, Storm ST is very useful for programs requiring much RAM, including FreeMiNT.
Prerequisites
Hardware
- Atari ST, STM, STF, STFM, or Mega ST
- (Atari STE and Mega STE are not supported)
- Socketed CPU or socket on top of the CPU (64pin DIL)
Even though the installation of the Storm ST is relatively easy, please note that it still requires some electronics experience. If you’re unsure, please ask a person that can help you with the installation.
The makers of the Storm ST are not liable for any damages to your computer that occur during installation of the Storm ST.
Note that not all original cases for the ST series allows easy stacking of components on top of the CPU or in a socket and still being able to close the case. Especially many 1040 mainboards have the CPU located towards the front, under the keyboard. Not enough room for a full stack of Storm+Lightning+Cloudy! Check your mainboard revision.
Important note: Please use the connectors (64pin) as rare as possible, as they are not designed for multiple in and out. They can be worn out and cause contact problems. An intermediate socket or the cautious bending of the pins to be inserted can be a remedy.
Hardware installation
1. If not already done: Install a DIL 64 socket.
- Note: There is no need to desolder/remove the CPU. You can also solder a socket on top of the CPU. Be sure to check that adjacent pins are not accidentally connected by a solder bridge.
2. Place the Storm ST into the installed DIL 64 socket or into any add-on board providing a DIL 64 socket, paying attention to the correct orientation.
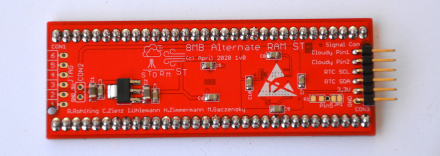
The triangular mark on the Storm ST and the notch in the socket / the CPU must be on the same side.
- Note: If you already have a Lightning ST or a Cloudy, you can stack the boards in any order.
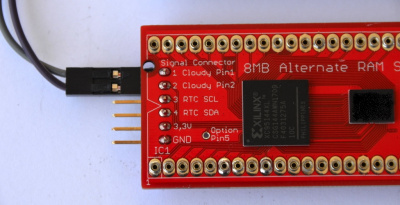
3. If you want to use the TOS decoder with the Cloudy: Connect the provided pair of jumper wires: Pin 1 on the Storm ST to pin 1 on the Cloudy and pin 2 to pin 2.
- Note: It can be advantageous to utilize the Storm ST’s TOS decoder, even if you already have your Cloudy connected to a Lightning ST. In contrast to the Lightning ST, the decoder implemented on the Storm ST does not need additional connections to the motherboard or modifications to support TOS 1.0x. However, it is not required to use the Storm ST’s decoder. If you have everything set up for Lightning ST to your satisfaction, there is no need to switch. In that case, simply leave pins 1 and 2 of the Storm ST unconnected.
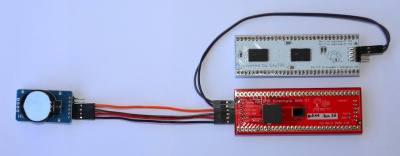
4. If you want to use the optional real time clock: Using the provided 4-wire cable, connect the pins SCL, SDA, 3.3V and GND of the Storm ST to the RTC, pins SCL, SDA, VCC, GND. Make sure that you have not accidentally connected the pins in reverse order. Install a suitable 3V coin cell (CR2032) on the RTC board.
- Note: In case you did not order an RTC with the Storm ST, you can use a DS3231 RTC board supplied by a third-party, as long as its pins are SCL, SDA, VCC, GND.
5. There is no need to connect a separate 5V supply to the Storm ST. It is supplied from the CPU socket.
6. The option pin5 on Storm ST is not in use. Please leave this pin and the unpopulated connector marked JTAG unconnected.
Software installation
No software is required when using EmuTOS. Alt-RAM and RTC (if connected) are detected and used automatically. You can verify this by looking at the boot screen.
For TOS 2.06 and MagiC driver programs are needed that should preferably be placed in your AUTO folder:
- ALTRAMON.PRG adds the alternate RAM to TOS memory management. From then on, this memory is automatically used by TOS and (most) applications.
- RTC_TIME.PRG synchronizes the computer’s clock with the RTC and makes TOS 2.06 Y2K-compatible.
Note: Under EmuTOS or after running RTC_TIME.PRG under Atari TOS, you can set the RTC using any program that changes date and time, such as the control panel. However, RTC_SET.PRG is also provided as a separate program to set the RTC.
Useful additions
You can use the following additional features together with the Storm ST. Please note that you may need a clock module and a Cloudy.
Thanks to Christian Zietz for all these extensions!
Real time clock
You can operate the Storm ST with only 4 cable connections (1:1 between GND, 3.3V, RTC SDA and RTC SCL) with a battery-backed up real time clock module (ZS-042 or DS3231 with 3V, CR2032). Cable and clock module are included in delivery.
EmuTOS detects the clock without driver. The transfer program for TOS 2.06 (RTC_TIME.PRG) is available here: Storm ST Driver and Tools. There you will also find the program to set the clock (RTC_SET.PRG for date and time).
It’s Year 2000 compatible!
Switch the OS of the Cloudy via software
TOSWITCH.TOS enables switching between the operating systems of the Cloudy via software, provided that a Storm ST is installend in the system in addition to the battery-backed clock module (ZS-042 or DS3231).
To do this, simply connect the pin called SQW of the clock module with pin 3 of the Cloudy, using a cable.
Pin 4 oft the Cloudy remains open. If there is a jumper on pin 3 und 4 of the cloudy, please remove it.
TOSWITCH.TOS recognizes the operating systems on the Cloudy and shows the active operating system with an *. Press Enter to restart the Atari ST with the other operating system. The selected setting is retained by the clock battery.
RAM disk
The STORMDSK.PRG uses the alternate RAM of the Storm ST and provides a very fast and configurable RAM disk.
You can set the size of the RAM disk and the drive letters with the well-known SETTER.PRG (found in Tools on the Lightning ST driver disk).
The RAM disk is reset-proof and can also survive a change of the OS with TOSWITCH.TOS.
The RAM disk also works with the Storm TT!
Current version: 1.0
Pictures
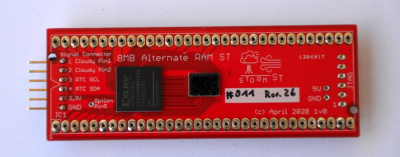
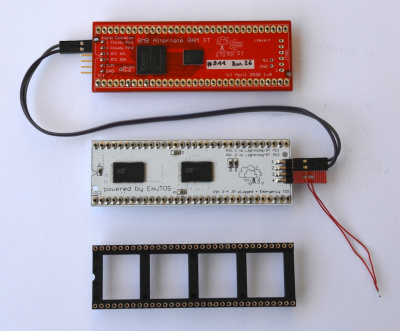
Pin 1 and 2 = TOS decoder (for use with Cloudy)
Pin 3 to 6 = optional RTC module
Storm ST with optional realtime clock module
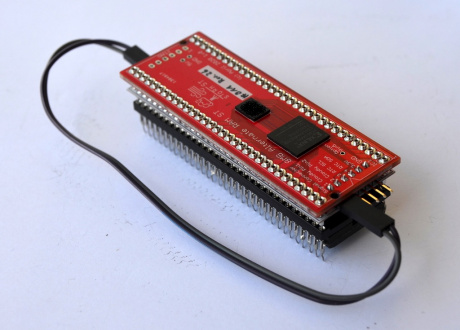
Storm ST with optional RTC and Cloudy, fully connected
Storm ST on top of the Cloudy (under the Cloudy there is a socket and then the CPU)
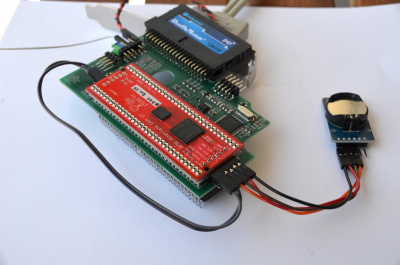
Complete expansion from bottom to top: CPU, socket, Lightning ST, Cloudy, Storm ST and RTC
With this modular tower you get: one IDE port, two USB ports, TOS decoder, two flashable operating systems, 8 MB alternate RAM, realtime clock.
Click here to see some more pictures of the "Storm ST - Cloudy - Lightning ST - combinations"
Links
Click here to download Drivers and Tools
11.08.2022, gaga & czietz
